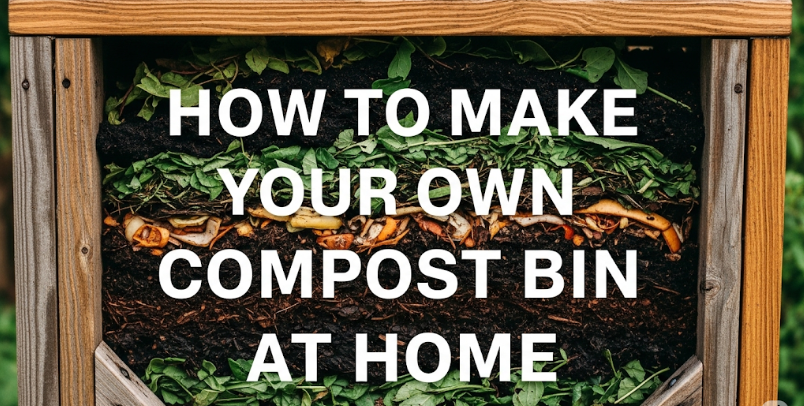
Creating a compost bin at home represents one of the most rewarding steps anyone can take toward sustainable living. This comprehensive guide walks through multiple methods for building effective compost systems that transform everyday kitchen scraps and yard waste into nutrient-rich soil amendment. Whether someone lives in an apartment with limited space or owns a sprawling backyard, there’s a composting solution that fits their lifestyle and budget.
Understanding the Basics of Home Composting
Composting works through a natural decomposition process where microorganisms break down organic matter into humus-rich soil. The key to successful composting lies in maintaining the right balance of materials, moisture, and airflow. When done correctly, a homemade compost bin can reduce household waste by up to 30% while producing valuable fertilizer for gardens.
The science behind composting involves both aerobic and anaerobic bacteria working together to decompose organic materials. Aerobic bacteria require oxygen and produce heat, which helps break down materials quickly and eliminates harmful pathogens. Anaerobic bacteria work in oxygen-poor environments and typically produce slower decomposition with potential odor issues if not managed properly.
Essential Components for Successful Composting
Every effective compost system requires four fundamental elements: carbon-rich materials (browns), nitrogen-rich materials (greens), proper moisture levels, and adequate airflow. The ideal carbon-to-nitrogen ratio stands at approximately 30:1, though this doesn’t need to be measured precisely for home composting success.
Composting Materials Breakdown
| Material Type | Examples | C:N Ratio | Decomposition Time |
|---|---|---|---|
| Browns (Carbon) | Dry leaves, newspaper, cardboard | 25-30:1 | 6-12 months |
| Greens (Nitrogen) | Kitchen scraps, fresh grass clippings | 15-20:1 | 2-6 months |
| Mixed Materials | Coffee grounds, eggshells | 20-25:1 | 3-8 months |
DIY Compost Bin Construction Methods
Building a compost bin doesn’t require extensive carpentry skills or expensive materials. Most effective designs use readily available items and basic tools. The choice of construction method depends on available space, budget constraints, and personal preferences for maintenance involvement.
Method 1: Wire Mesh Cylinder Bin
Materials Needed
Construction Process
Start by measuring and cutting the wire mesh to create a cylinder approximately 3-4 feet in diameter. This size provides adequate space for proper decomposition while remaining manageable for turning and maintenance. Overlap the edges by 4-6 inches and secure them with zip ties or wire every 6 inches along the seam.
Installation and Setup
Position the cylinder in a partially shaded area with good drainage. The location should receive morning sun but avoid intense afternoon heat. Push the bottom edge slightly into the soil to prevent the bin from shifting during use. This method creates excellent airflow and makes turning compost materials relatively easy.
Method 2: Wooden Pallet Compost Bin
Gathering Materials
Collect four wooden pallets of similar size, preferably heat-treated rather than chemically treated. Additional materials include wood screws, a drill, hinges for a removable front panel, and a latch mechanism. This method creates a more permanent structure with better containment than wire mesh options.
Assembly Instructions
Begin by creating the back wall using one pallet as the foundation. Attach the two side pallets at 90-degree angles, ensuring they’re level and square. The front pallet should be attached with hinges to allow easy access for adding materials and removing finished compost. Secure all connections with appropriate wood screws driven through the pallet frames.
Pro Tip
Before using any wooden pallets, verify they’re marked “HT” (heat-treated) rather than “MB” (methyl bromide treated). Heat-treated pallets are safe for composting, while chemically treated ones can introduce harmful substances into the compost system.
Method 3: Plastic Storage Container System
For apartment dwellers or those with limited outdoor space, a plastic container system offers an excellent solution. This method works well for small-scale composting and can even be used indoors with proper ventilation management.
Container Selection and Preparation
Choose a plastic storage container with a tight-fitting lid, ideally 18-gallon capacity or larger. Drill holes throughout the container for ventilation – approximately 20-30 holes on the sides, bottom, and lid. Each hole should be about 1/4 inch in diameter, spaced roughly 2 inches apart.
Creating the Drainage System
Place a layer of coarse material like small twigs or wood chips at the bottom of the container. This creates drainage and prevents the compost from becoming waterlogged. Add a thin layer of soil or finished compost to introduce beneficial microorganisms that kickstart the decomposition process.
Optimal Placement and Site Selection
The location of a compost bin significantly impacts its effectiveness and maintenance requirements. Ideal placement balances accessibility, environmental conditions, and practical considerations like odor management and neighborhood relations.
Environmental Factors
Choose a location that receives partial sunlight – enough to warm the compost and speed decomposition, but not so much that it dries out quickly. Areas with natural windbreaks work well, as they provide protection from excessive drying while still allowing air circulation. Avoid low-lying areas where water might collect, as waterlogged compost develops anaerobic conditions that produce unpleasant odors.
Consider proximity to water sources for occasional moisture management. During dry spells, compost piles may need supplemental watering to maintain optimal decomposition rates. However, avoid areas directly under roof gutters or in natural water collection zones.
Practical Considerations
Position the bin within reasonable distance from the kitchen to encourage regular use. Many people abandon composting projects when the bin is too far from daily routines. At the same time, maintain adequate distance from windows, outdoor living spaces, and property lines to prevent potential odor issues from affecting daily life or neighbor relations.
Placement Distance Guidelines
| Distance From | Minimum Distance | Reason |
|---|---|---|
| House Foundation | 10-15 feet | Prevent moisture and pest issues |
| Property Lines | 3-5 feet | Neighbor consideration and access |
| Wells or Water Sources | 50+ feet | Prevent contamination |
| Outdoor Dining Areas | 20-30 feet | Odor and pest management |
Materials That Work Best for Composting
Understanding which materials decompose effectively helps create balanced, productive compost systems. The key lies in combining carbon-rich and nitrogen-rich materials while avoiding items that can cause problems or attract pests.
Excellent Green Materials (Nitrogen-Rich)
Fresh grass clippings provide excellent nitrogen content but should be mixed with brown materials to prevent matting and anaerobic conditions. Kitchen vegetable scraps, including peelings, cores, and stems, decompose quickly and add valuable nutrients. Coffee grounds, despite their dark color, are considered green materials and can comprise up to 25% of compost volume.
Fresh plant trimmings from gardens, including spent flowers and pruned branches (chopped into small pieces), contribute nitrogen and beneficial microorganisms. Eggshells, while slow to decompose, add calcium and help balance pH levels in acidic compost systems.
Essential Brown Materials (Carbon-Rich)
Dry leaves represent the gold standard of brown materials, providing excellent carbon content and creating air pockets that promote proper decomposition. Shredded newspaper and cardboard work well, though they should be used in moderation and mixed thoroughly with other materials. Avoid glossy papers or heavily inked materials.
Sawdust and wood chips from untreated lumber add carbon and help absorb excess moisture. However, these materials decompose slowly and should be used sparingly – no more than 10% of total compost volume. Straw and hay provide excellent carbon sources, though hay may contain seeds that sprout in the finished compost.
Materials to Avoid
Never add meat, dairy products, oils, or pet waste to compost systems. These materials can attract pests, create odors, and potentially introduce harmful pathogens. Also avoid diseased plants, weeds with seeds, and materials treated with pesticides or herbicides.
Maintenance and Turning Techniques
Regular maintenance ensures optimal decomposition rates and prevents common problems like odors, pest attraction, and slow processing. The frequency and intensity of maintenance depends on the composting method chosen and desired timeline for finished compost.
Turning and Aeration
Turning compost materials every 2-4 weeks provides oxygen to aerobic bacteria and helps maintain proper temperature levels. Use a pitchfork or specialized compost turning tool to move materials from the center to the outside edges and vice versa. This process redistributes moisture and ensures even decomposition throughout the pile.
For bins that make turning difficult, consider using a compost aerator tool – a long-handled device with folding tines that can be inserted into the pile and twisted to create air channels. This method requires less physical effort while still providing necessary aeration.
Moisture Management
Proper moisture content feels like a wrung-out sponge – damp but not dripping. During dry periods, add water gradually while turning the compost. During wet seasons, add dry brown materials to absorb excess moisture. Covering the bin with a tarp or lid during heavy rains prevents oversaturation.
Composting Timeline
Week 1-2: Initial Setup
Add initial materials, ensure proper brown-to-green ratio, and maintain adequate moisture levels.
Week 3-6: Active Phase
Temperature rises, materials begin breaking down. Turn weekly and monitor moisture.
Week 7-12: Maturation
Temperature decreases, materials become less recognizable. Turn every 2-3 weeks.
Week 13-24: Finishing
Materials resemble dark, crumbly soil. Minimal turning required.
Troubleshooting Common Issues
Even well-designed compost systems occasionally develop problems. Understanding common issues and their solutions helps maintain productive composting operations without major disruptions.
Odor Problems
Unpleasant odors typically indicate anaerobic conditions caused by too much moisture, insufficient air circulation, or excessive green materials. Solutions include adding brown materials, turning the pile more frequently, and improving drainage. Sweet, earthy smells indicate healthy decomposition, while sour or rotten odors suggest problems requiring attention.
If odors persist despite corrective measures, consider whether prohibited materials like meat or dairy products were accidentally added. These items may need to be removed manually to restore proper decomposition conditions.
Pest Management
Fruit flies often indicate too much fresh fruit material or inadequate covering of new additions. Bury fresh materials under existing compost or add a layer of brown materials over new additions. Larger pests like rats or raccoons suggest the presence of inappropriate materials or insufficient bin security.
Installing hardware cloth at the base of bins prevents burrowing animals from accessing compost from below. Secure lids and sturdy construction deter most scavenging animals, though persistent problems may require relocating the bin or switching to a more secure design.
Slow Decomposition
Materials that break down slowly may lack nitrogen, moisture, or proper aeration. Adding fresh green materials, ensuring adequate moisture levels, and increasing turning frequency typically resolves these issues. Chopping materials into smaller pieces before adding them to the bin accelerates decomposition by increasing surface area available to microorganisms.
Cold weather naturally slows decomposition, so expect reduced activity during winter months. Insulating bins with straw or leaves helps maintain some microbial activity even in freezing temperatures.
Harvesting and Using Finished Compost
Finished compost resembles dark, crumbly soil with an earthy smell and few recognizable original materials. The harvesting process depends on the bin design and intended use for the finished product.
Testing for Completion
Mature compost should crumble easily when squeezed and have a pleasant, earthy aroma. The temperature should match ambient air temperature, indicating that active decomposition has ceased. A simple germination test involves planting seeds in pure compost – if they sprout and grow normally, the compost is ready for use.
Some materials like eggshells, small twigs, and fruit pits may remain partially intact even in finished compost. These can be screened out for aesthetic purposes or left in place, as they’ll continue decomposing slowly in garden applications.
Application Methods
Fresh compost works excellently as a soil amendment, mixed into garden beds at a ratio of 1:3 (one part compost to three parts existing soil). For potted plants, use a more diluted mixture to prevent overwhelming delicate root systems. Compost tea, made by steeping finished compost in water, provides gentle liquid fertilization for established plants.
Side-dressing involves spreading compost around the base of growing plants, providing slow-release nutrients throughout the growing season. This method works particularly well for heavy feeders like tomatoes, corn, and squash.
Compost Application Rates
| Application Type | Compost Amount | Best Uses |
|---|---|---|
| Soil Amendment | 2-4 inches deep | New garden beds, annual preparation |
| Mulch | 1-2 inches deep | Around trees, shrubs, perennials |
| Potting Mix | 25-33% of total volume | Container gardens, seed starting |
| Topdressing | 1/4 to 1/2 inch | Lawns, established beds |
Advanced Composting Techniques
Once basic composting becomes routine, several advanced techniques can improve efficiency, reduce processing time, or address specific gardening needs. These methods require more attention but offer enhanced results for dedicated composters.
Hot Composting Method
Hot composting accelerates decomposition by maintaining temperatures between 130-160°F through careful material ratios and frequent turning. This method requires larger quantities of materials added simultaneously and more intensive management but produces finished compost in 6-12 weeks rather than 6-12 months.
The key to hot composting lies in achieving proper carbon-to-nitrogen ratios and maintaining adequate pile size (minimum 3 feet cubed) to generate and retain heat. Daily temperature monitoring helps optimize turning schedules and material additions.
Vermicomposting Integration
Adding red worms to compost bins creates a hybrid system that processes materials more quickly while producing higher-quality finished compost. Worms consume decomposing organic matter and produce nutrient-rich castings that enhance soil structure and fertility.
This method works best in moderate climates where temperatures remain between 40-85°F. Extreme temperatures can kill worm populations, so seasonal management or bin relocation may be necessary in harsh climates.
Seasonal Considerations and Year-Round Management
Successful composting adapts to seasonal changes in temperature, moisture, and material availability. Understanding these patterns helps maintain productive systems throughout the year while taking advantage of seasonal opportunities.
Spring and Summer Operations
Warm weather accelerates decomposition, allowing for more frequent harvesting and material additions. However, increased temperatures also require more attention to moisture management and pest prevention. Regular turning becomes more critical as materials decompose rapidly and can develop anaerobic conditions quickly.
Summer provides abundant green materials from lawn mowing and garden maintenance, but brown materials may become scarce. Collecting and storing fall leaves or shredded paper during dry periods ensures adequate carbon sources throughout the growing season.
Fall and Winter Strategies
Fall leaf collection provides excellent opportunities to stockpile brown materials for year-round use. Shredding leaves before storage prevents matting and speeds decomposition when added to compost systems. Many composters create dedicated leaf storage areas or fill bins exclusively with leaves to decompose slowly over winter.
Winter composting continues at reduced rates, with decomposition slowing significantly in freezing temperatures. Insulating bins with straw, leaves, or tarps helps maintain some microbial activity. Adding materials during winter is possible but turning becomes less frequent due to reduced decomposition rates.
Winter Composting Tips
Continue adding kitchen scraps throughout winter, but increase the ratio of brown materials to prevent odors and pest attraction. Consider storing materials in a garage or basement container if outdoor access becomes difficult due to weather conditions.
Environmental Impact and Sustainability Benefits
Home composting provides significant environmental benefits beyond personal garden improvement. Understanding these impacts helps motivate continued composting efforts and demonstrates the broader value of this sustainable practice.
Waste Reduction Impact
The average household generates approximately 650 pounds of organic waste annually, much of which ends up in landfills where it produces methane, a potent greenhouse gas. Home composting diverts this material from waste streams while creating valuable soil amendments that reduce the need for commercial fertilizers.
Composting also reduces the frequency of garbage collection needs, decreasing fuel consumption and wear on municipal waste management systems. Communities with high composting participation rates often experience reduced waste management costs and extended landfill lifespans.
1 thought on “How to Make Your Own Compost Bin at Home”