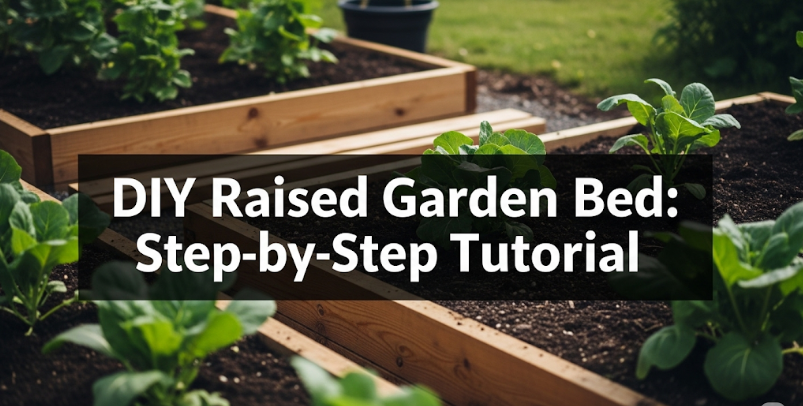
Building a raised garden bed doesn’t require advanced carpentry skills or expensive tools. This detailed tutorial will guide anyone through creating a beautiful, functional raised bed that will serve their garden for years to come.
Understanding Raised Garden Beds
Raised garden beds have revolutionized home gardening by offering solutions to common soil and space problems. These elevated planting areas consist of a frame that holds soil above ground level, creating an ideal growing environment for vegetables, herbs, and flowers.
The concept behind raised beds stems from the need to improve drainage, soil quality, and accessibility. When soil sits in a contained frame above ground, it warms up faster in spring, drains better after heavy rain, and stays looser for better root development. This controlled environment allows gardeners to create perfect growing conditions regardless of their yard’s natural soil composition.
Better Drainage
Elevated soil prevents waterlogging and root rot, especially important in clay-heavy or poorly draining yards.
Improved Soil Quality
Complete control over soil composition allows for optimal nutrient levels and pH balance.
Easier Maintenance
Reduced bending and kneeling makes gardening more comfortable and accessible.
Pest Control
Physical barriers help keep out ground-dwelling pests and make pest management easier.
Extended Growing Season
Soil warms up faster in spring and stays warmer longer in fall.
Space Efficiency
Intensive planting methods work better in the controlled environment of raised beds.
Planning Your Raised Garden Bed
Successful raised bed construction starts with thoughtful planning. The size, location, and materials chosen will determine how well the bed functions and how long it lasts.
Choosing the Right Location
Location affects every aspect of garden success. Most vegetables need six to eight hours of direct sunlight daily, so choose a spot that receives morning sun and isn’t shaded by trees or buildings during peak growing hours. The area should also have good air circulation to prevent fungal diseases.
Consider proximity to water sources since raised beds dry out faster than ground-level gardens. A location within reach of a garden hose or near a rain barrel makes maintenance much easier. Also think about access paths—you’ll need to walk around the bed for planting, weeding, and harvesting.
Determining Size and Dimensions
The ideal raised bed balances functionality with practicality. Width should never exceed four feet if accessing from one side, or eight feet if accessible from both sides. This ensures you can reach the center without stepping on the soil, which would compact it and defeat one of the main benefits of raised beds.
Length depends on available space and personal preference, but 8 to 12 feet works well for most gardeners. Height varies based on intended use—8 to 12 inches works for most vegetables, while root vegetables like carrots and parsnips benefit from 12 to 18 inches of depth.
| Bed Dimensions | Best For | Soil Volume Needed |
|---|---|---|
| 4′ x 8′ x 8″ | Leafy greens, herbs | 21 cubic feet |
| 4′ x 8′ x 12″ | Most vegetables | 32 cubic feet |
| 4′ x 12′ x 12″ | Family garden | 48 cubic feet |
| 3′ x 6′ x 8″ | Small spaces, herbs | 12 cubic feet |
Materials and Tools Required
Choosing quality materials ensures your raised bed will last for many growing seasons. While initial costs might seem high, durable materials provide better value over time than cheaper alternatives that need frequent replacement.
Essential Materials
- Lumber: 2×10 or 2×12 cedar boards for sides (cedar naturally resists rot and insects)
- Corner brackets: Metal corner brackets or wooden corner posts (4×4 inch posts work well)
- Screws: 2.5-3 inch galvanized or stainless steel screws
- Hardware cloth: 1/4 inch mesh to prevent burrowing pests (optional but recommended)
- Landscape fabric: Weed barrier for the bottom (optional)
- Soil mix: High-quality garden soil, compost, and amendments
Required Tools
- Measuring tape
- Circular saw or miter saw
- Drill with bits
- Level
- Shovel
- Rake
- Work gloves
- Safety glasses
Material Selection Guidelines
Cedar ranks as the top choice for raised bed construction due to its natural resistance to rot, insects, and moisture. While more expensive than pine or fir, cedar beds can last 10-15 years with minimal maintenance. Avoid pressure-treated lumber for vegetable gardens, as chemicals can leach into soil.
For budget-conscious gardeners, untreated pine or fir boards offer a temporary solution, typically lasting 3-5 years. These woods cost significantly less but require replacement more frequently. Some gardeners prefer this approach, especially when starting out or experimenting with bed placement.
Cost Comparison (4′ x 8′ x 12″ bed)
| Material | Initial Cost | Lifespan | Cost Per Year |
|---|---|---|---|
| Cedar boards | $80-120 | 10-15 years | $6-12 |
| Pine boards | $40-60 | 3-5 years | $10-20 |
| Composite boards | $150-200 | 20+ years | $7-10 |
Step-by-Step Construction Process
Building a raised garden bed follows a logical sequence that ensures structural integrity and longevity. Taking time with each step prevents problems later and creates a bed that will serve your garden well for years.
Begin by marking the bed’s location using spray paint or stakes and string. Clear the area of grass, weeds, and debris. While some gardeners leave grass in place, removing it prevents competition for nutrients and eliminates pest hiding spots.
Level the ground using a rake and shovel. Perfect leveling isn’t necessary, but removing major bumps and dips ensures the bed sits stable. If building on a slope, consider terracing or creating a level platform.
Measure and cut your boards to size. For a 4′ x 8′ bed, you’ll need two 8-foot boards and two 4-foot boards. Make cuts as square as possible—uneven cuts create gaps that allow soil to spill out.
Sand any rough edges to prevent splinters and ensure pieces fit together cleanly. This step also removes any loose wood fibers that could harbor pests or diseases.
Start assembly on a flat surface like a driveway or patio. This ensures the frame stays square during construction. Lay out the boards in position and check that corners align properly.
Attach corners using either corner brackets or by overlapping boards. If using brackets, position them on the inside of the frame where they won’t be visible. For overlapped joints, predrill holes to prevent splitting.
Use a speed square or measuring tape to check that the frame is square by measuring diagonally across corners. Both diagonal measurements should be equal.
Cut hardware cloth to fit the bottom of the frame, leaving a 2-inch border on all sides. This mesh prevents gophers, moles, and other burrowing pests from entering the bed from below.
Staple the cloth to the bottom of the frame, pulling it taut to prevent sagging. Fold the excess up the sides and staple in place. This creates a complete barrier while allowing water drainage.
Move the assembled frame to its final location. Having helpers makes this much easier, especially for larger beds. Place the frame on the prepared ground and check that it sits level.
If needed, adjust the ground beneath the frame or add shims to level it. A slightly unlevel bed won’t harm plants, but severely tilted beds can cause uneven water distribution.
Fill the bed with a quality soil mix. The best approach combines equal parts compost, peat moss or coconut coir, and vermiculite. This creates a loose, well-draining medium that retains moisture while providing excellent aeration.
Add soil in layers, watering lightly between additions to help settling. Fill slightly above the rim since soil will compress over time. The bed is ready for planting once soil settles to about one inch below the rim.
Pro Tips for Success
- Pre-drill all screw holes to prevent wood splitting
- Use a drill bit slightly smaller than your screw diameter
- Apply wood preservative to cut ends for extra protection
- Consider adding wheels or handles for moveable beds
- Install drip irrigation lines before filling with soil
Soil Preparation and Filling
The soil mix determines plant health and productivity more than any other factor. Raised beds offer complete control over soil composition, allowing gardeners to create ideal growing conditions from the start.
Understanding Soil Components
Quality garden soil combines several elements that work together to support plant growth. Organic matter provides nutrients and improves soil structure, while mineral components ensure proper drainage and aeration. The goal is creating a balanced medium that holds moisture without becoming waterlogged.
Compost serves as the foundation of good garden soil, providing slow-release nutrients and beneficial microorganisms. Well-aged compost should smell earthy and crumble easily in your hands. Avoid fresh compost, which can burn plant roots and attract pests.
Recommended Soil Mix Recipe
- 40% high-quality compost
- 30% peat moss or coconut coir
- 20% vermiculite or perlite
- 10% coarse sand (builder’s sand, not fine sand)
This mixture provides excellent drainage while retaining moisture and nutrients. Adjust proportions based on your climate—add more water-retaining materials in dry areas, more drainage materials in wet regions.
Calculating Soil Volume
Determining how much soil to buy prevents shortages during construction. Calculate volume by multiplying length times width times depth, then convert to cubic feet or yards depending on how suppliers sell soil.
For example, a 4′ x 8′ x 12″ bed requires 32 cubic feet of soil. Since bagged soil is expensive for large beds, consider buying bulk soil from landscape suppliers. Bulk soil costs significantly less and often provides better quality than bagged alternatives.
Common Soil Mistakes to Avoid
- Using topsoil alone—it’s often too heavy and may contain weed seeds
- Adding too much sand—this creates concrete-like conditions
- Using fresh manure—it can burn plants and attract pests
- Neglecting pH testing—most vegetables prefer slightly acidic to neutral soil
- Compacting soil during filling—this reduces aeration and drainage
Maintenance and Care
Proper maintenance keeps raised beds productive and attractive for many years. Regular care prevents problems and ensures plants have optimal growing conditions throughout the season.
Seasonal Maintenance Tasks
Spring preparation involves adding fresh compost and checking for winter damage. Remove any weeds that sprouted over winter and test soil pH if needed. This is also the time to repair any loose boards or hardware.
Summer maintenance focuses on watering and harvest management. Raised beds dry out faster than ground-level gardens, especially during hot weather. Mulching helps retain moisture and suppress weeds while keeping soil temperatures stable.
Fall cleanup includes removing spent plants and adding organic matter. Cover crops planted in unused beds improve soil structure and prevent erosion. This is also the time to plan crop rotations for the following year.
Watering Strategies
Raised beds require more frequent watering than traditional gardens due to improved drainage. However, the soil also warms up faster and stays looser, allowing roots to access water more efficiently.
Drip irrigation or soaker hoses provide the most efficient watering method. These systems deliver water directly to plant roots while minimizing evaporation. Install irrigation lines before filling beds with soil for the cleanest installation.
Additional Resources
For more detailed information about soil testing and amendments, visit the Extension Organization for research-based gardening advice.
The Old Farmer’s Almanac offers excellent guidance on plant spacing and companion planting for raised beds.
Troubleshooting Common Issues
Even well-built raised beds can develop problems over time. Understanding common issues and their solutions helps maintain productive growing conditions.
Drainage Problems
Poor drainage usually results from using too much clay soil or fine materials in the soil mix. Water pooling on the surface after rain indicates compacted or impermeable soil. Fix drainage issues by adding coarse materials like perlite or small gravel to improve soil structure.
Conversely, beds that dry out too quickly may have too much sand or drainage material. Adding compost or peat moss increases water retention while maintaining good drainage.
Pest and Disease Issues
Raised beds can still experience pest problems, though they’re generally easier to manage than ground-level gardens. Row covers provide physical protection from flying insects, while beneficial insects help control pest populations naturally.
Disease prevention focuses on good air circulation and avoiding overhead watering. Space plants properly and remove any diseased material immediately to prevent spread.
Structural Problems
Boards may warp or separate over time, especially with cheaper lumber. Regular inspection helps catch problems early when they’re easier to fix. Tighten loose screws and replace damaged boards as needed.
Soil settling is normal and expected. Add fresh soil or compost each spring to maintain proper depth. This also replenishes nutrients depleted by previous crops.
Conclusion
Building a raised garden bed transforms any outdoor space into a productive growing area. This project requires basic carpentry skills and common tools, making it accessible to gardeners of all experience levels. The benefits of improved drainage, better soil quality, and easier maintenance make raised beds an excellent investment for serious gardeners.
Success depends on careful planning, quality materials, and proper soil preparation. Taking time with each step ensures the bed will provide years of productive growing. The initial investment in good materials and soil pays dividends through increased yields and reduced maintenance needs.
Whether growing vegetables, herbs, or flowers, raised beds offer control over growing conditions that’s impossible with traditional ground-level gardens. This controlled environment allows gardeners to create optimal conditions for their chosen plants while minimizing common problems like poor drainage and soil compaction.
Related Post: Build a Simple Drip Irrigation System for Your Garden